
Red meat is great for you, especially very lean red meat such as Top Sirloin, flat steak, and of course, the gorgeous Filet mignon (Chateaubriand or tenderloin). Bison meat is a perfect choice for lean meat. Although I had to reduce my red meat intake over the past two years, I love red meat and still experiment.
Heart failure can really screw up your favorite foods and quantities!
I have a newfound love for chicken meat; wings, drumsticks, breasts, spatchcocked, thighs, and of course, the chicken riding a beer can. There are so many lovely recipes to serve chicken; one tastes better than the next. Many cultures have developed a culinary adventure using chicken.
Chicken is not a boring dish. You just need to explore different approaches.
I have been craving a nice and perhaps a little spicy chicken sandwich in my recent chicken journey. I do not want a chicken burger using ground chicken, but an actual chicken fillet or other chicken cuts.
I’m proud to share a very nice chicken sandwich, inexpensive and yet very delicious … and spicy.
At least for most grill approaches, the key to a soft and tender poultry cut is brine. You have to brine your meat for 2-24 hours, depending on the size and cut of the meat. It is recommended for a whole bird to brine it for 18-24 hours – in my humble opinion.
For smaller cuts like thighs and breasts, you can brine for 2-4 hours. Pieces without skin brine faster as the juices penetrate the meat easier.

I’m using the cheaper chicken thighs for my sandwiches. These cuts are also known as the brown meat on a chicken and are underrated. Before throwing these suckers into the brine, I remove excessive fat and debone them. You can buy them deboned and with no skin. You do not want skin on your chicken sandwiches. Buying the thighs prepped saves you time.
When making a nice, sorry, awesome chicken sandwich, you need to follow a few steps. And, when dealing with the brining process, you should not leave this to the last minute. The brining process for chicken thighs is 2-4 hours.
For my chicken sandwiches, the below items are key to your experience. You can decide to buy the condiments and bread, or perhaps make them yourself.
I prefer homemade stuff. It simply tastes better and does not contain all the strange sh*t added by mass-production and cheap ingredients. It is your choice in the end.
I have included the links to my tasty, easy slaw and my burger buns for your convenience. They might come in handy if you want to really impress your dinner guests.
Chicken sandwiches are broken into four simple steps. A chicken love story.
- The chicken spa treatment (brine process) – scroll down!
- A Bloody Marvelous Slaw (health cabbage chicken thigh wrapping) – click the link!
- Hot buns (sandwich) – click the link!
- Traeger chicken love (grilling) – scroll even further down!
Brine time!
To brine your meat, or any meat for that matter, is an interesting method of making the meat juicier. Consider it a spa treatment for your meat, showing it some TLC by submerging it into a unique watery and salty solution.
In theory, the salt will penetrate the meat’s proteins to allow the cells to retain more moisture. It’s like an affectionate seaweed wrap.
You can add all kinds of herbs, fruits, liquids to your brine. Each additional ingredient may boost flavor to your meat.
However, for my spicy chicken thighs, I have discovered a straightforward and excellent brine-pickle juice.
Yes, you read right. Pickle juice. You can actually buy pickle juice by the gallon, which means you don’t have to buy multiple jars of pickled something to get enough juice for a brine. I bought a gallon on Amazon.
The Brine
It is a super easy process, and you don’t need much; meat, bowl and brine.
- Remove excess fat from the chicken thighs
- Place the thighs in a large bowl
- Cover the thighs with pickle juice
- Place the bowl in the fridge for 2-4 hours.
Please note, the meat will get a yellow tint of the pickle brine. That’s normal.
The batter
The batter! Some might refer to the batter as ‘The Dredge.” This is like a sleeping bag of spices and flavors. The perfect chicken sandwich depends on a proper batter that keeps the juices contained and delivers an awesome taste experience. It is an essential part of the chicken sandwich experience.
You can buy the flavored flour directly from my friends over at Meat Church, or you can make your own.
The Dredge
- 2 cups of flour
- 3 tablespoons of paprika
- 3 tablespoons of Meat Church Holy Voodoo
- 2 tablespoons of garlic powder
- 2 tablespoons of Paprika
- 1 tablespoon of onion powder
- 1 tablespoon of Cayenne pepper
Mix all the ingredients in a large bowl, and get ready for the double hit.
The Wash
- 2 eggs
- 4 tablespoons of Frank hot sauce
- 1 cup of buttermilk
Mix all the ingredients in a large bowl, and get ready for the double hit.

Heating up the oil 
Thighs after the brine 
Dredge station 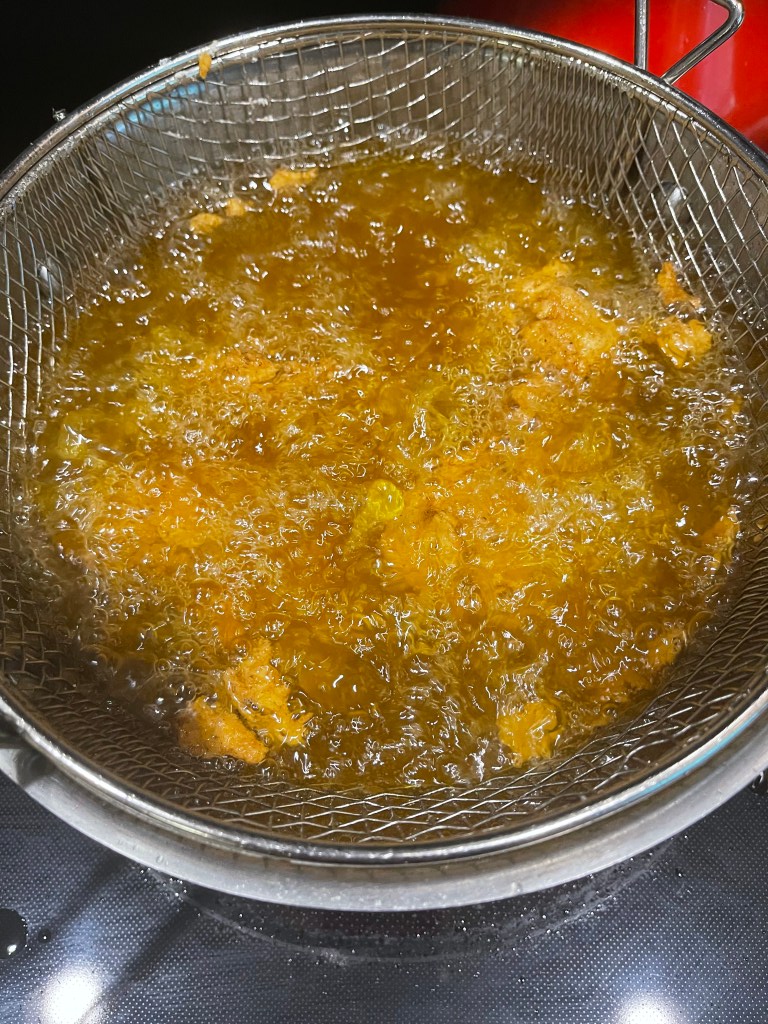
Frying that shit! 
End result
Tales of Two Hits
There’s nothing worse than a dried-up piece of chicken with some strange crispy outside. It would be best to have a good thick batter (dredge) and a sizzling fryer to get a nice juicy chicken sandwich. A perfect dredge retains the chicken juices and delivers hot flavors to the tastebuds.
The secret behind the perfect batter is obviously the flavored floured mixture, but more importantly, the double hit. Dredge, wash, and then another dredge. Yes, twice into the dredge for extra
The First Hit!
The “secret” to a nice chicken sandwich is the batter or dredge.
You dip each chicken breast into the thick sauce, making sure it is fully coated.
Then roll it on the flour mixture for a nice dry cover.
The Double hit!
For the perfect chicken sandwich, you need to hit the chicken thighs twice.
The double hit is vital to create an awesome coating, and will elevate your chicken game.
Repeat steps from the First Hit.
The Sizzle
The final piece is to deep fry each battered chicken thigh in hot oil. It seals the flavors inside the batter while keeping the chicken meat nice, soft and juicy.
Please, be very careful when you embark on deep frying food. Slowly insert the chicken pieces into the oil, minimizing the spraying. Drops from the oil will be painful and can cause burn blisters.
Always hold the put with one hand when adding the chicken to avoid the pot from moving and potentially drop off your stove.
- Heat the oil (peanut or corn oil) to 325F.
- Gentle place the chicken thighs into the oil
- Fry the chicken until the batter, is nice, golden, and brown.
- Test the internal temperature. It has to reach 165F. Again, be careful when testing the temperature.
Depending on the size of your fryer setup, you might have to fry the chicken in batches. I can only fry two thighs simultaneously and safely. The more you add to the hot oil, the more it will bubble and potentially spillover. You do not want oil all over and cause a potential fire risk.
Time to eat
Serve the chicken on a nice brioche with coleslaw, pickles and add some hot sauce, if you want it spicy.
These chicken sandwiches are a family favorite. It is not a fast meal, but worth the wait.
Stay in touch with me through social media!

[…] spicy chicken thigh sandwich served on a homemade bun, spicy mayo, and […]
LikeLike